

BriElle Harker and Robert Lewis are photographers for The Signpost at Weber State University in Ogden, Utah. During summer vacation they have been practicing their craft and trying different camera techniques to give readers some ideas for taking their own photographs.
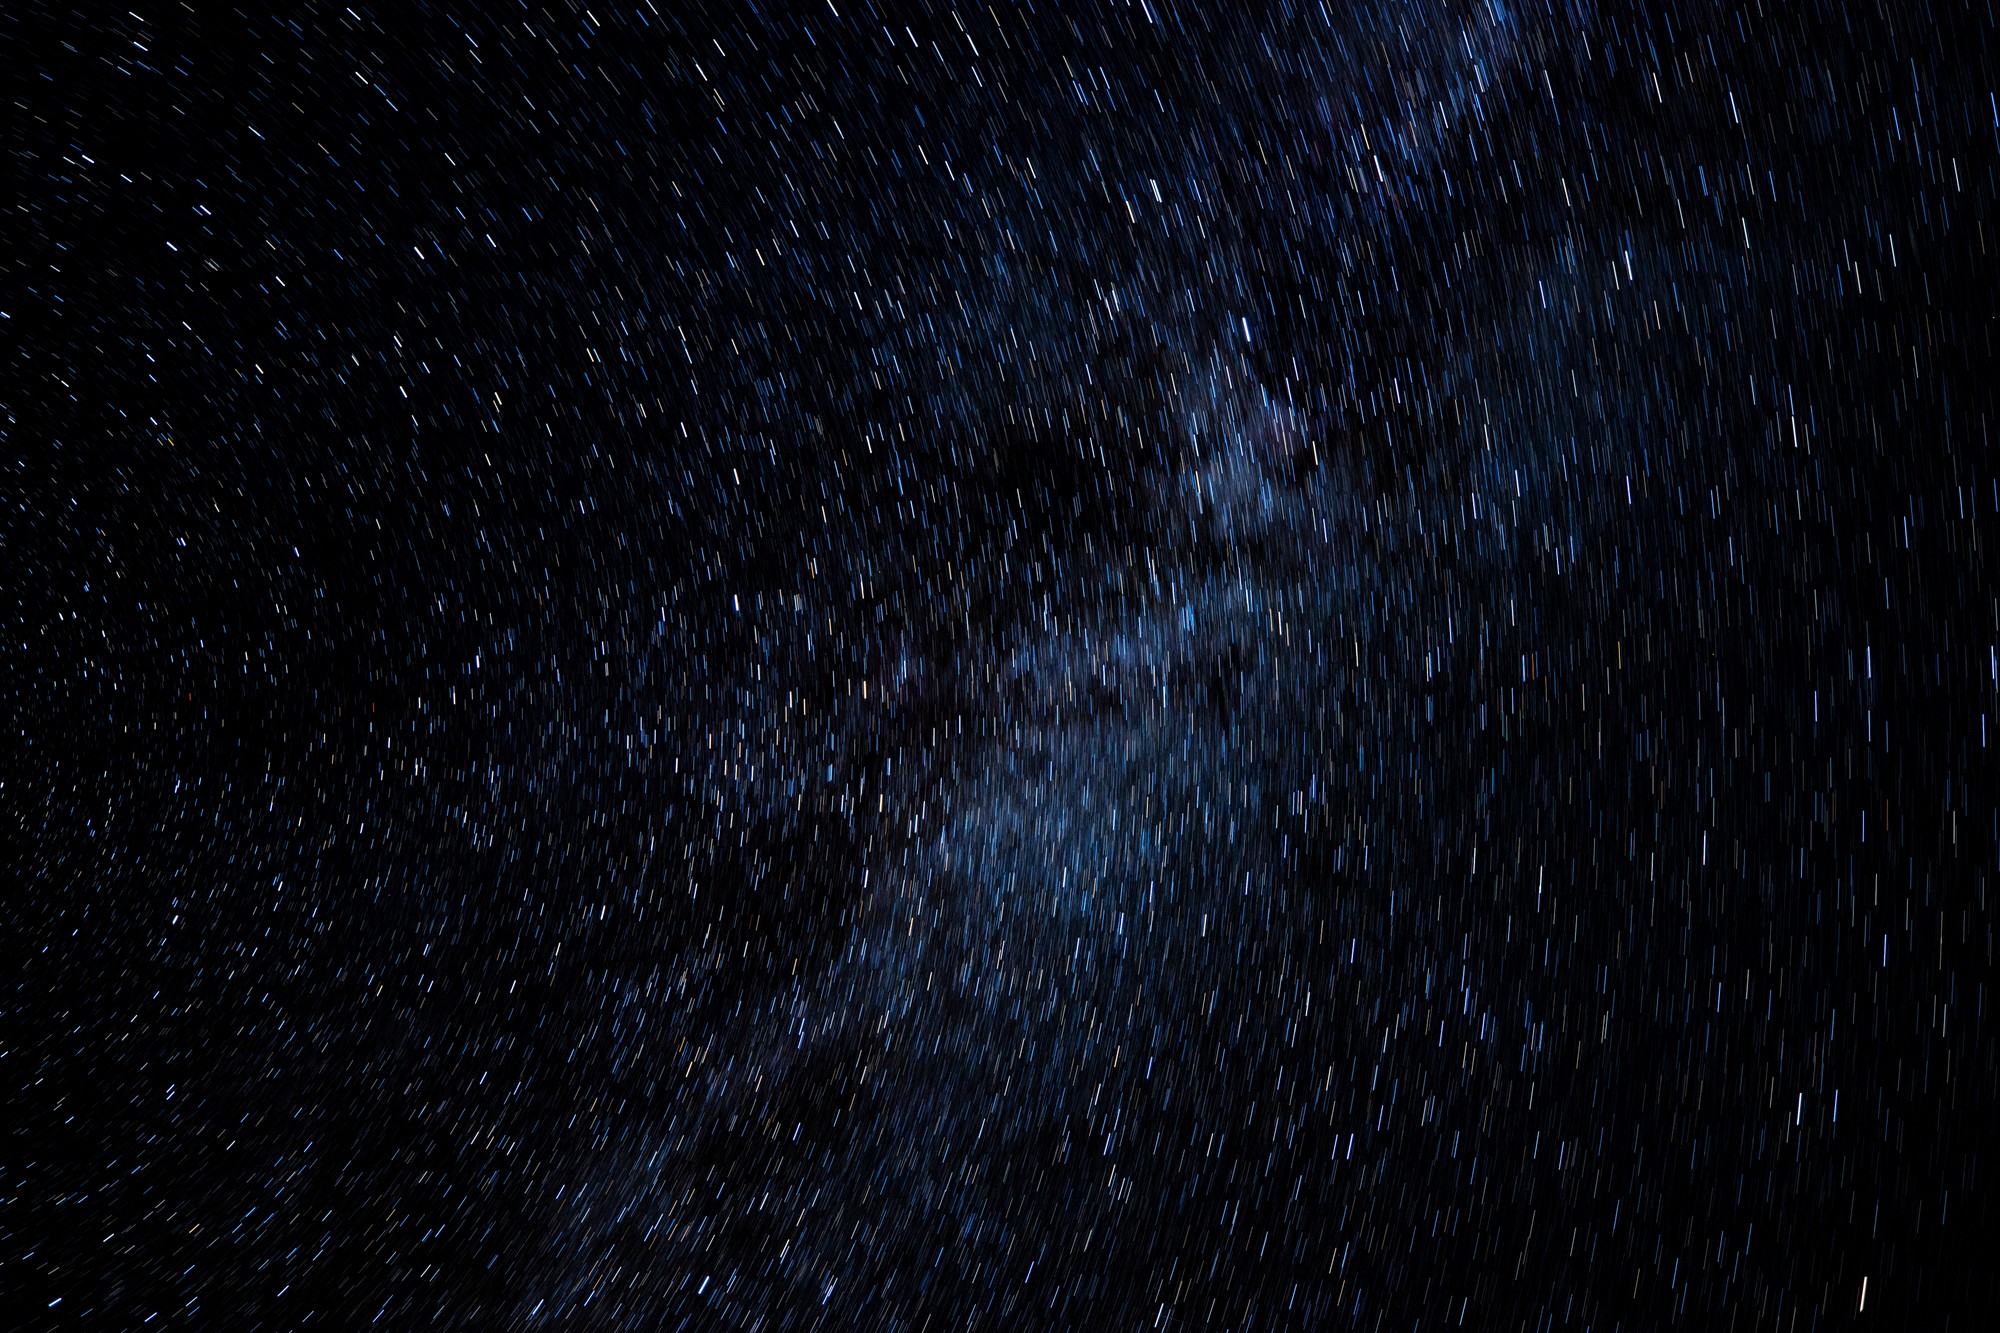
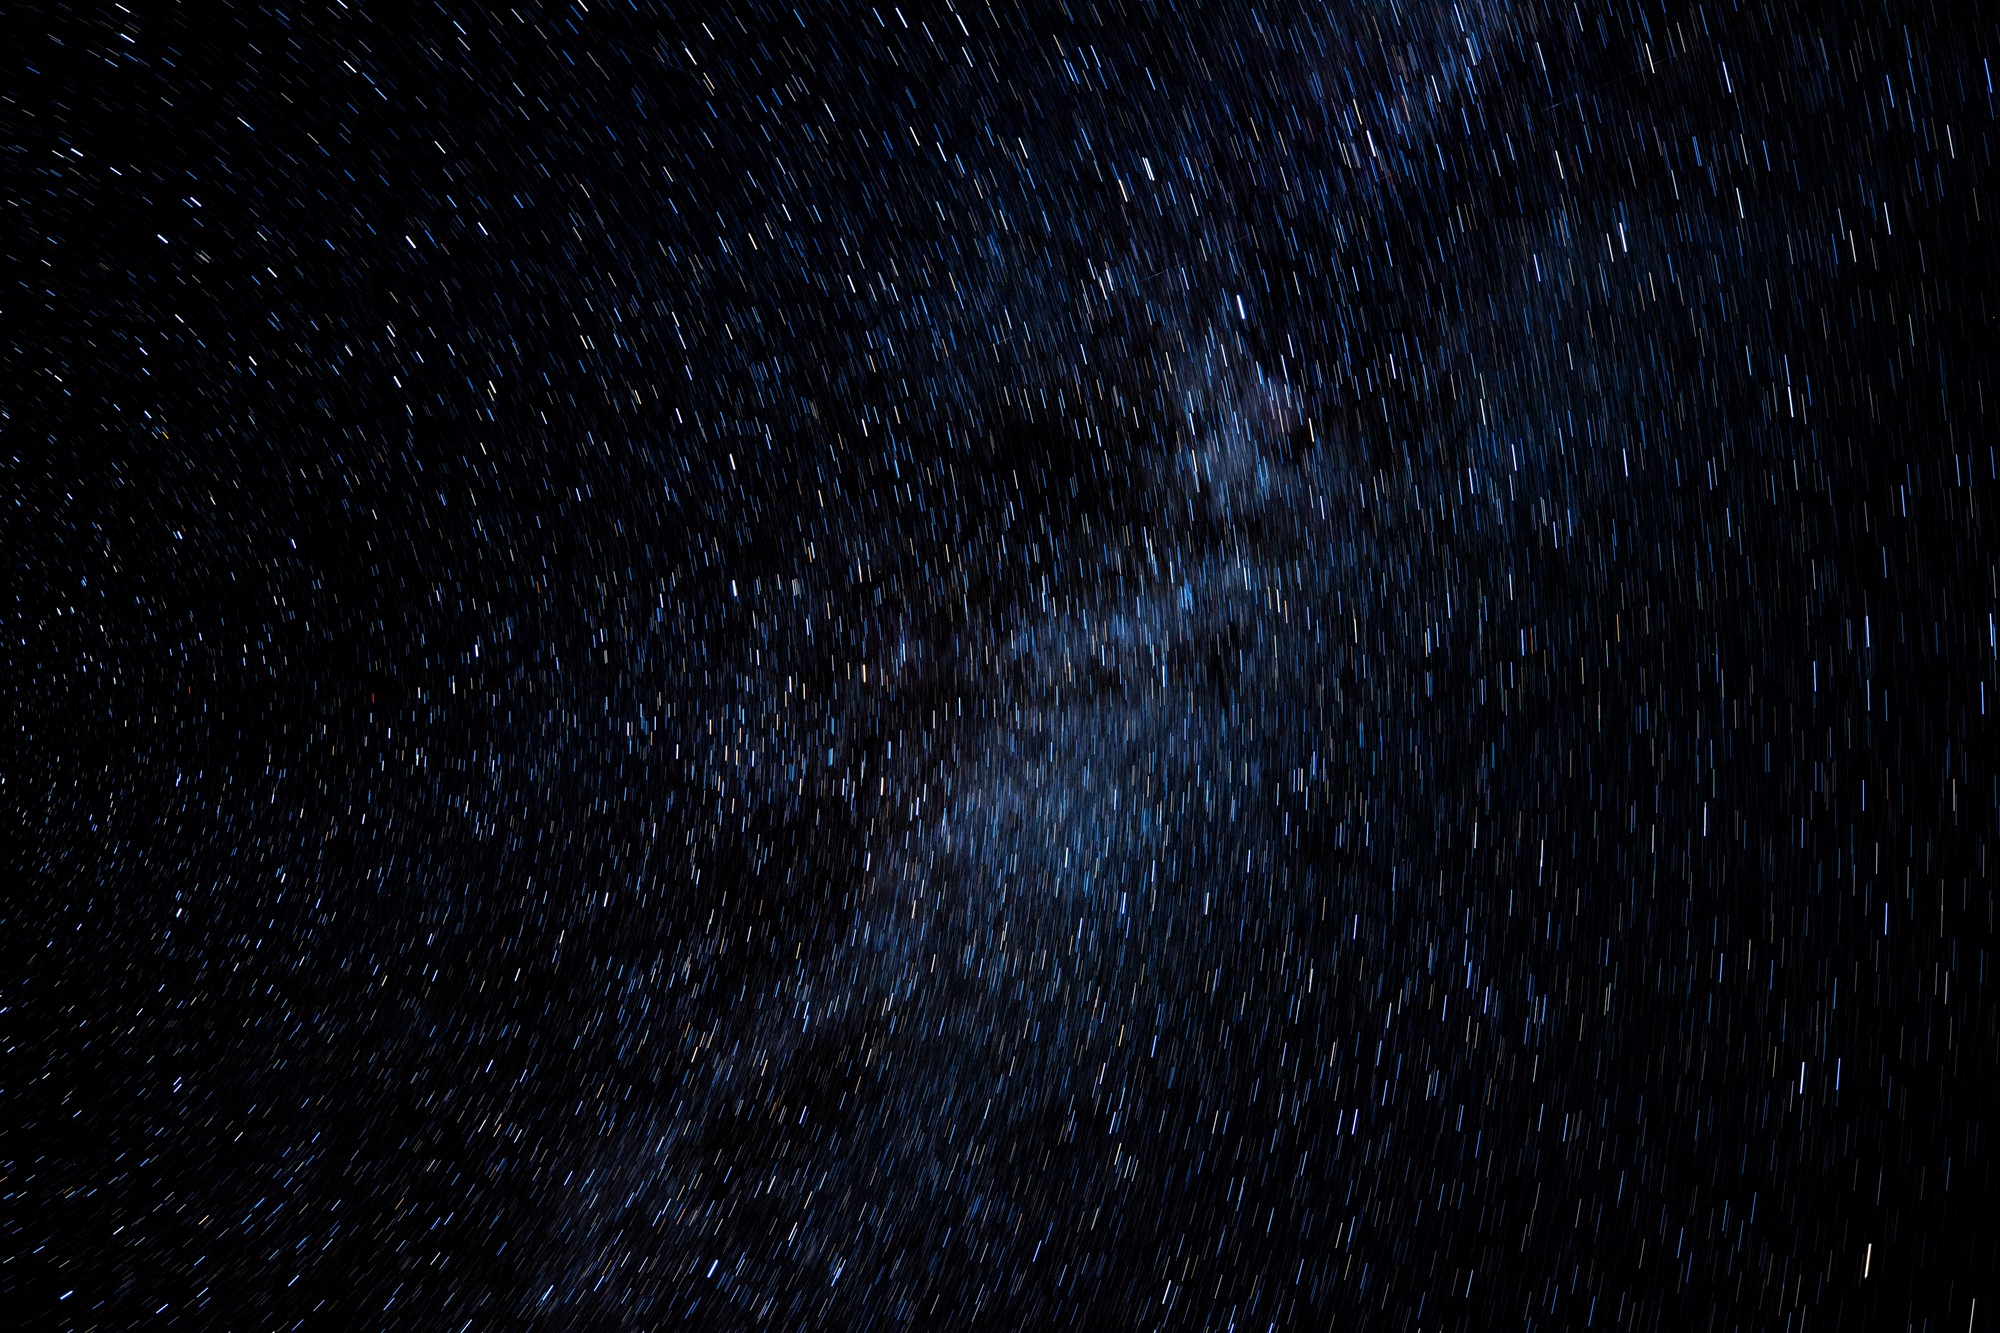
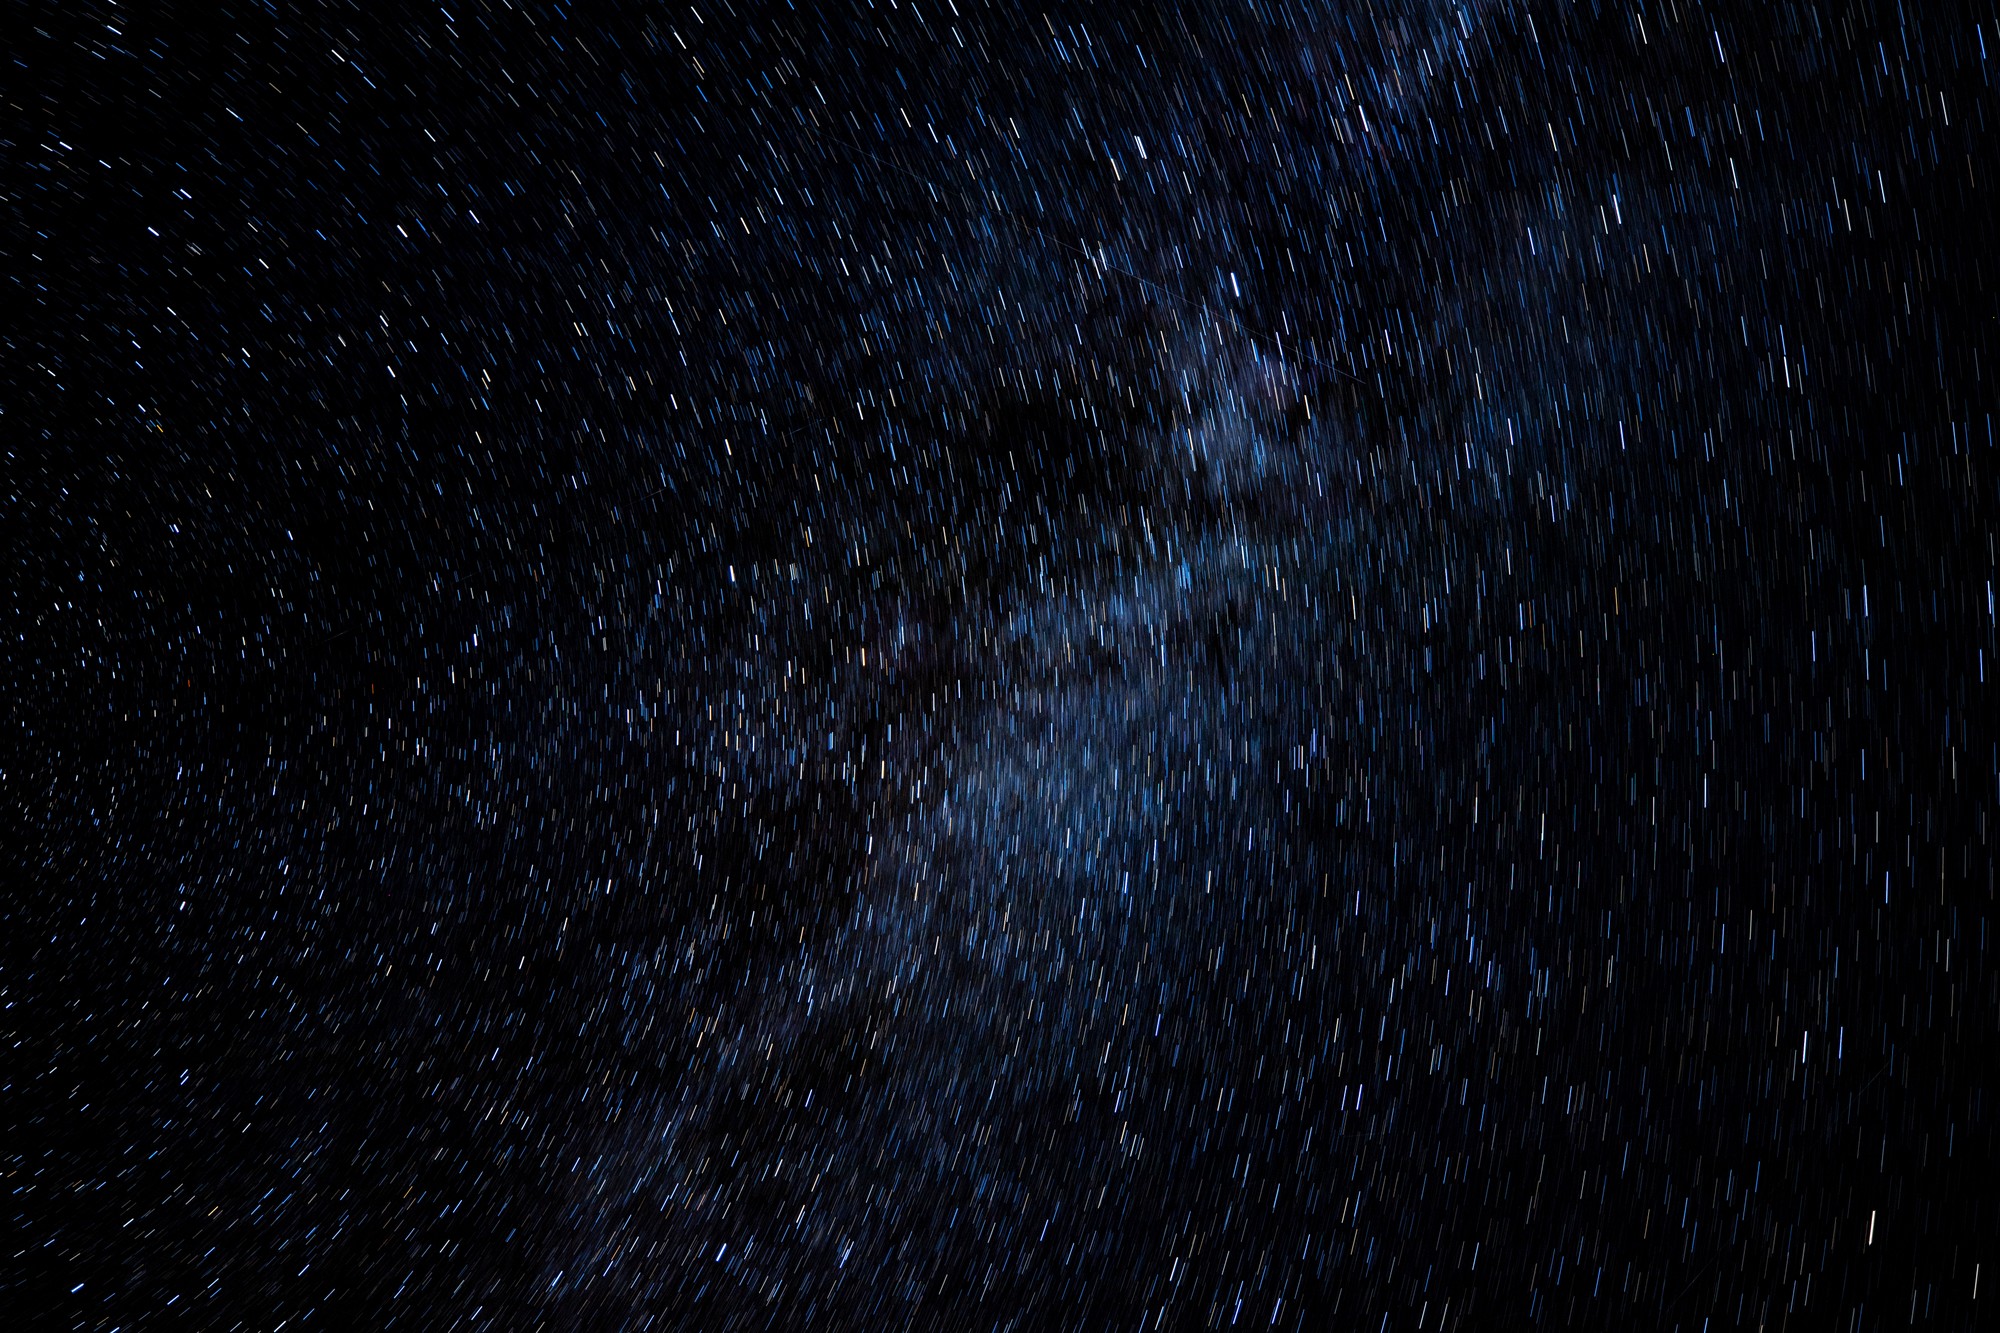
Hi, Robert here. This week I tried night photography again. My goal was to make star trails while photographing the night sky. Holding the camera’s shutter open for a few minutes makes the stars appear as streaks of light on the photograph. This is caused by the rotation of the Earth.
To do this, I needed a tripod and a remote timer for the camera, Adobe’s Lightroom and Photoshop software. The tripod is used to keep the camera steady. The remote is used to hold the shutter open while the camera is set in bulb mode. Lightroom and Photoshop are for processing and combining the photographs. Also, it helps a lot if you are in a dark-sky area.
I was at Causey Reservoir near Huntsville, Utah, for my photos. It’s not a dark-sky area, but it worked okay for my first attempt at learning how to photograph star trails.
The equipment I brought along included a tripod, a 15-millimeter-to-35-millimeter-zoom lens with a f/2.8 stop, the Canon EOS R and one of Canon’s Timer Remote Control units.
The timer remote control was necessary to operate the camera. It is used to set the self-timer, interval, length of exposure and the number of shots.
I set the self-timer for a two second delay, and, to avoid vibration from pressing the shutter button, the interval between shots at one second, the exposure time to four minutes and the number of shots to five.
It was about 10 p.m. when I finished setting up my equipment. At the time there was no moon in the sky. Here are five of the photos I took.
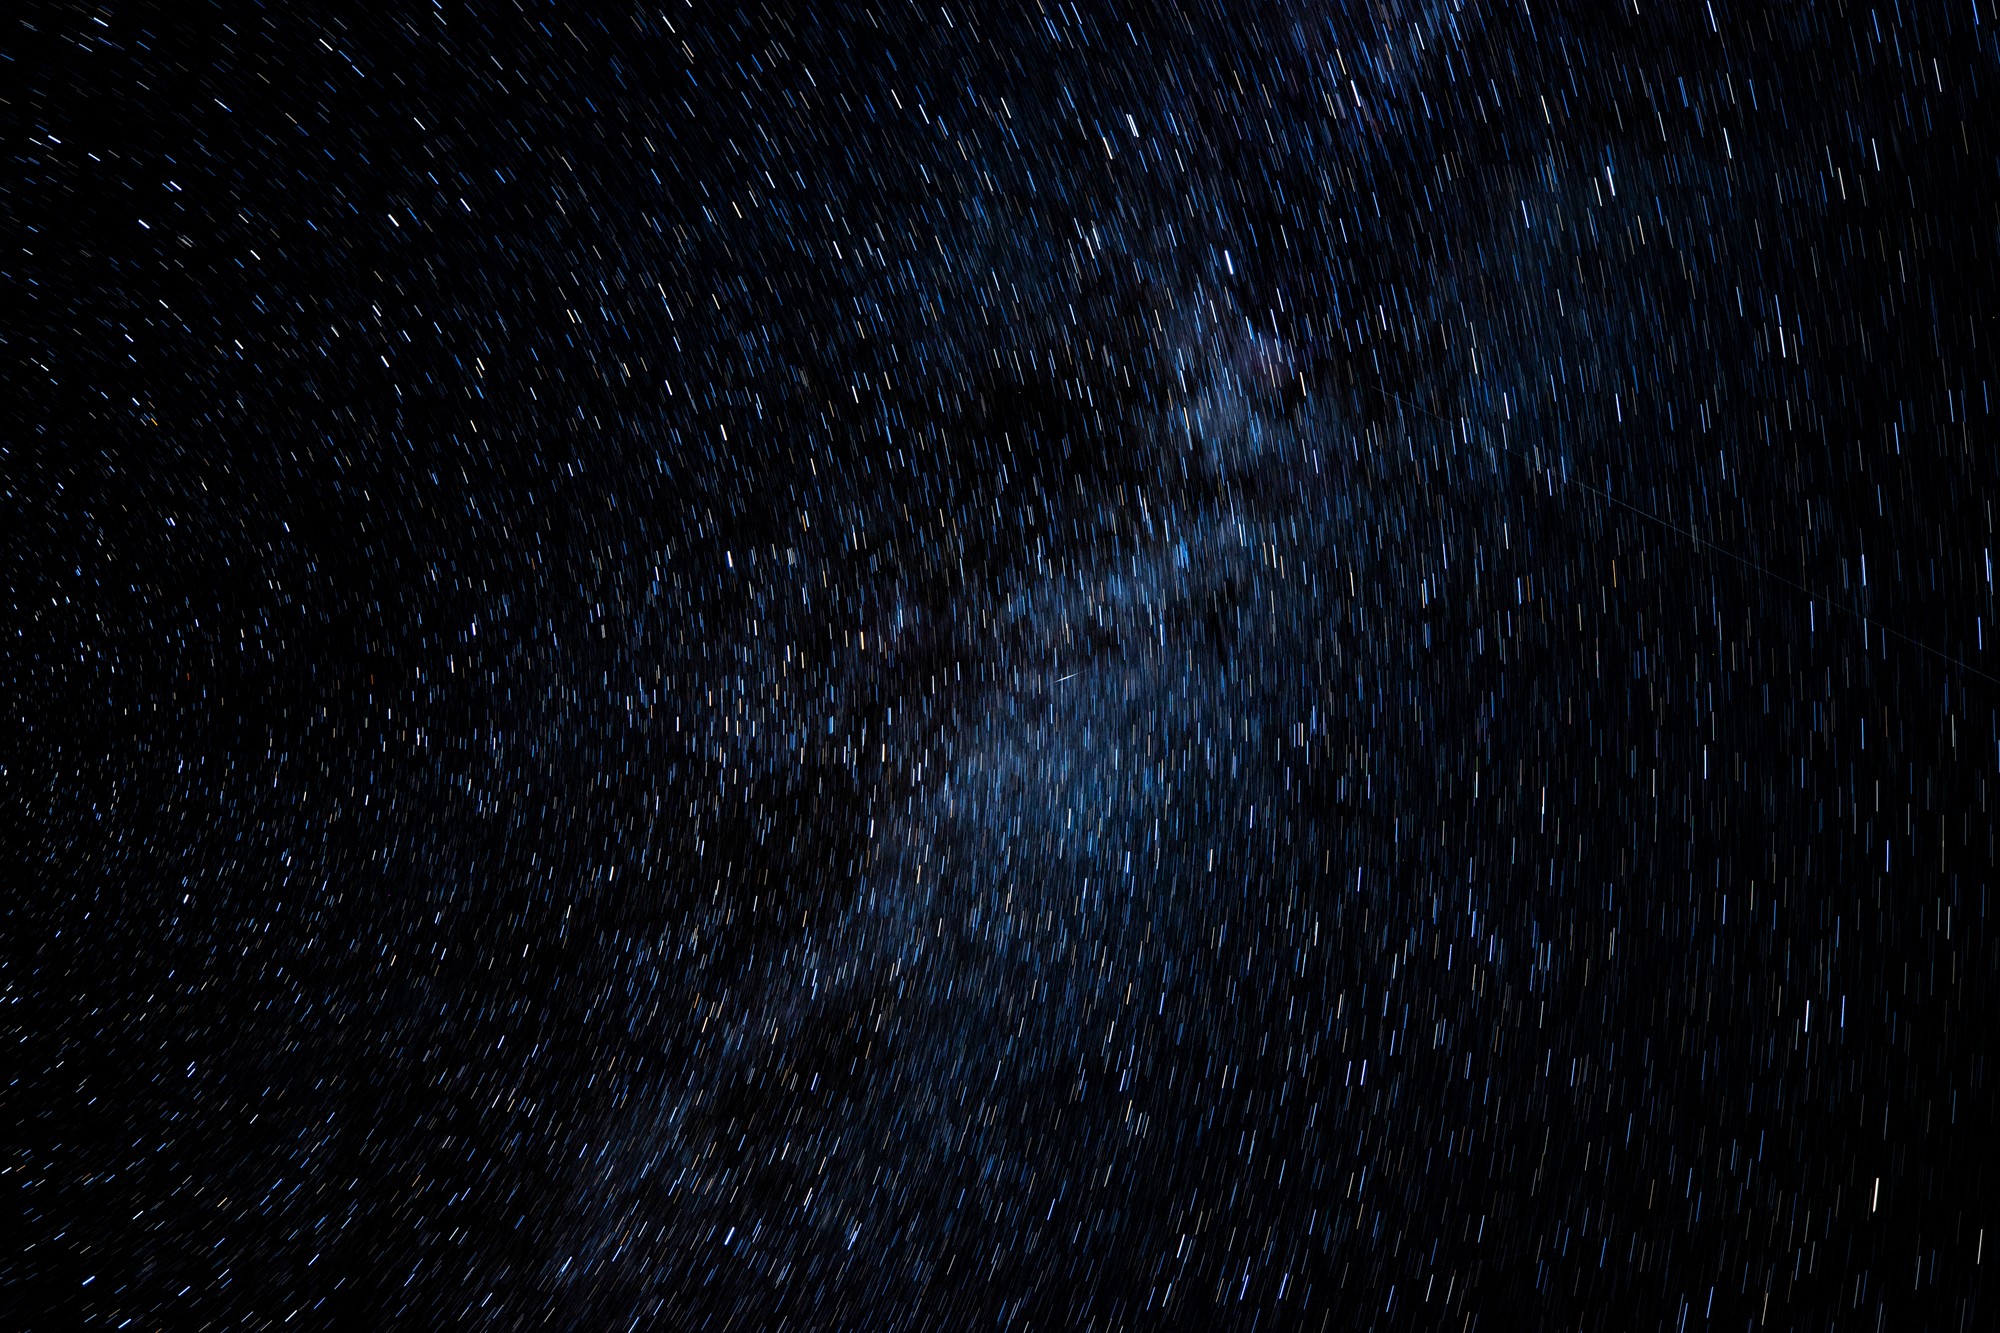
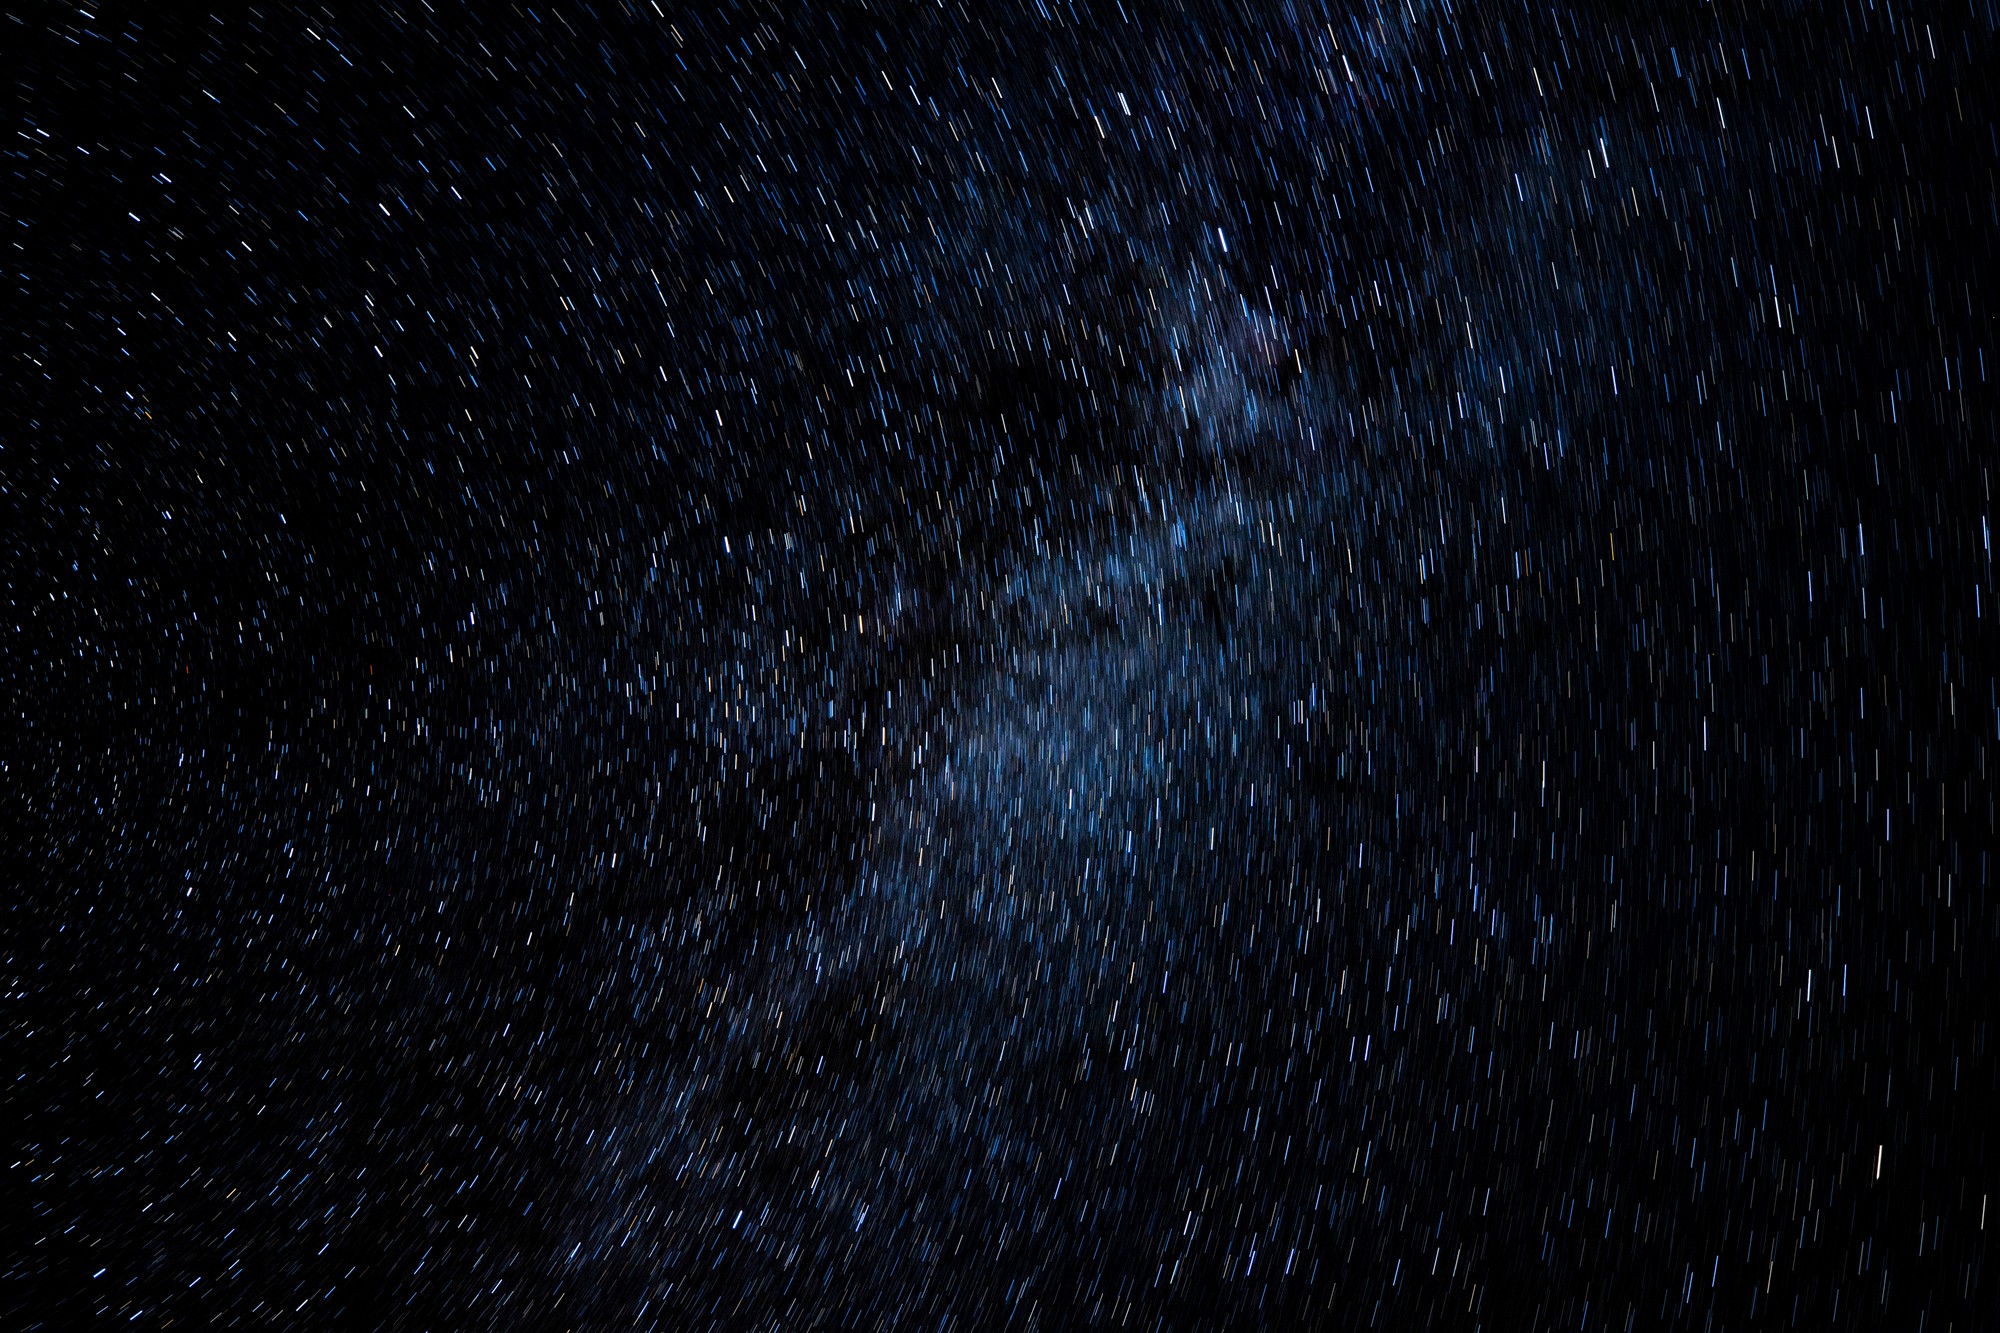
Now, I could have taken one 20-minute photograph, but I didn’t. The reason I took five photos at four-minute lengths was to prevent noise from appearing in the pictures.
Noise/graininess appears when the camera’s sensor gets hot from being on for a long period of time. Allowing the sensor a second to cool between photos helps to prevent noise. But, a time greater than one second between photos leaves a very noticeable gap in the star trails – there is software to fix the gaps. However, I didn’t have any when I took these shots.
To process the photos, I used Lightroom to adjust the colors and exposure. Then I exported them to Photoshop for combining them into one image.
To do this, I started in Lightroom by selecting photos, edit in, open layers in Photoshop. Once inside Photoshop, select all the layers by clicking on the bottom layer then press the shift key and click on the top layer. Then go to edit, auto-blend layers, turn on stack images in the small window and click Ok. Now, go to the layer at the top and choose flatten. This will reduce the file size. Finally, click on file then save, file then close to return to Lightroom. The image will be sent to Lightroom as a JPEG with xxxx-Edit.jpg file name extension.
Here is my photo of the five images stacked as layers.

I think it turned out okay for my first time making this type of photograph. I’m sure BriElle has some great photos, let’s see what she has going on.
Hey, it’s BriElle. This week I did something very fun, I used long exposures to paint with light. Depending on how long the camera’s shutter is held open, one can move lights through the frame and they will appear everywhere they were placed.
For this type of photography one needs some supplies: a camera, tripod and a light source. I used my Canon Rebel T7 with an 18-millimeter-to-55-millimeter lens and a tripod to keep the camera still while taking photos. And I used glow sticks for my light source. I also purchased 6 puck lights off of Amazon that can change color. I attached them to a straight piece of wood in a line.
It is important to find a dark area to take your photos. It prevents your photos from getting over exposed.
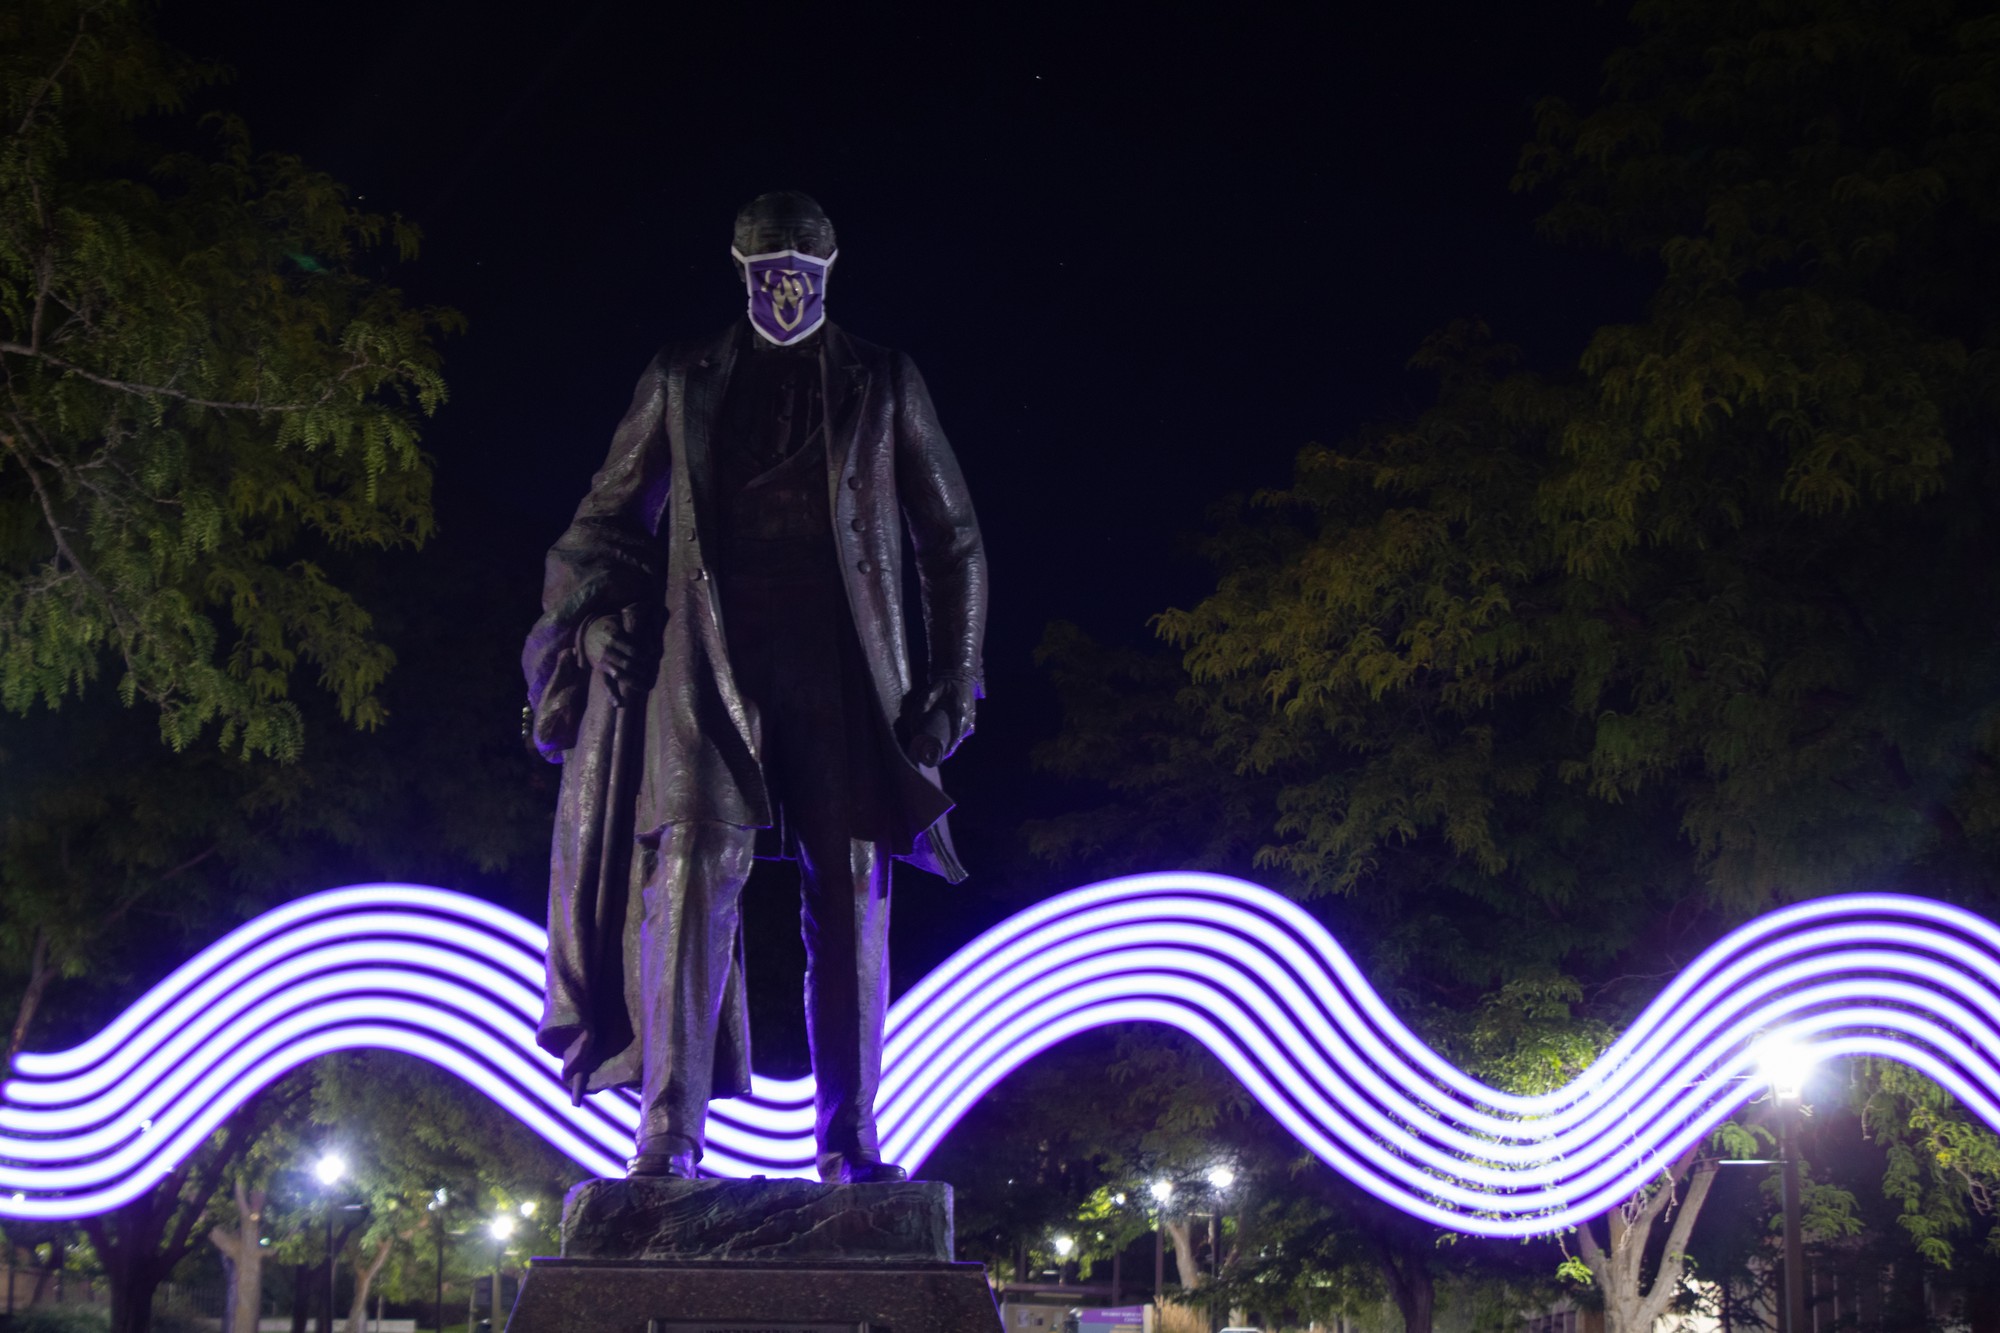
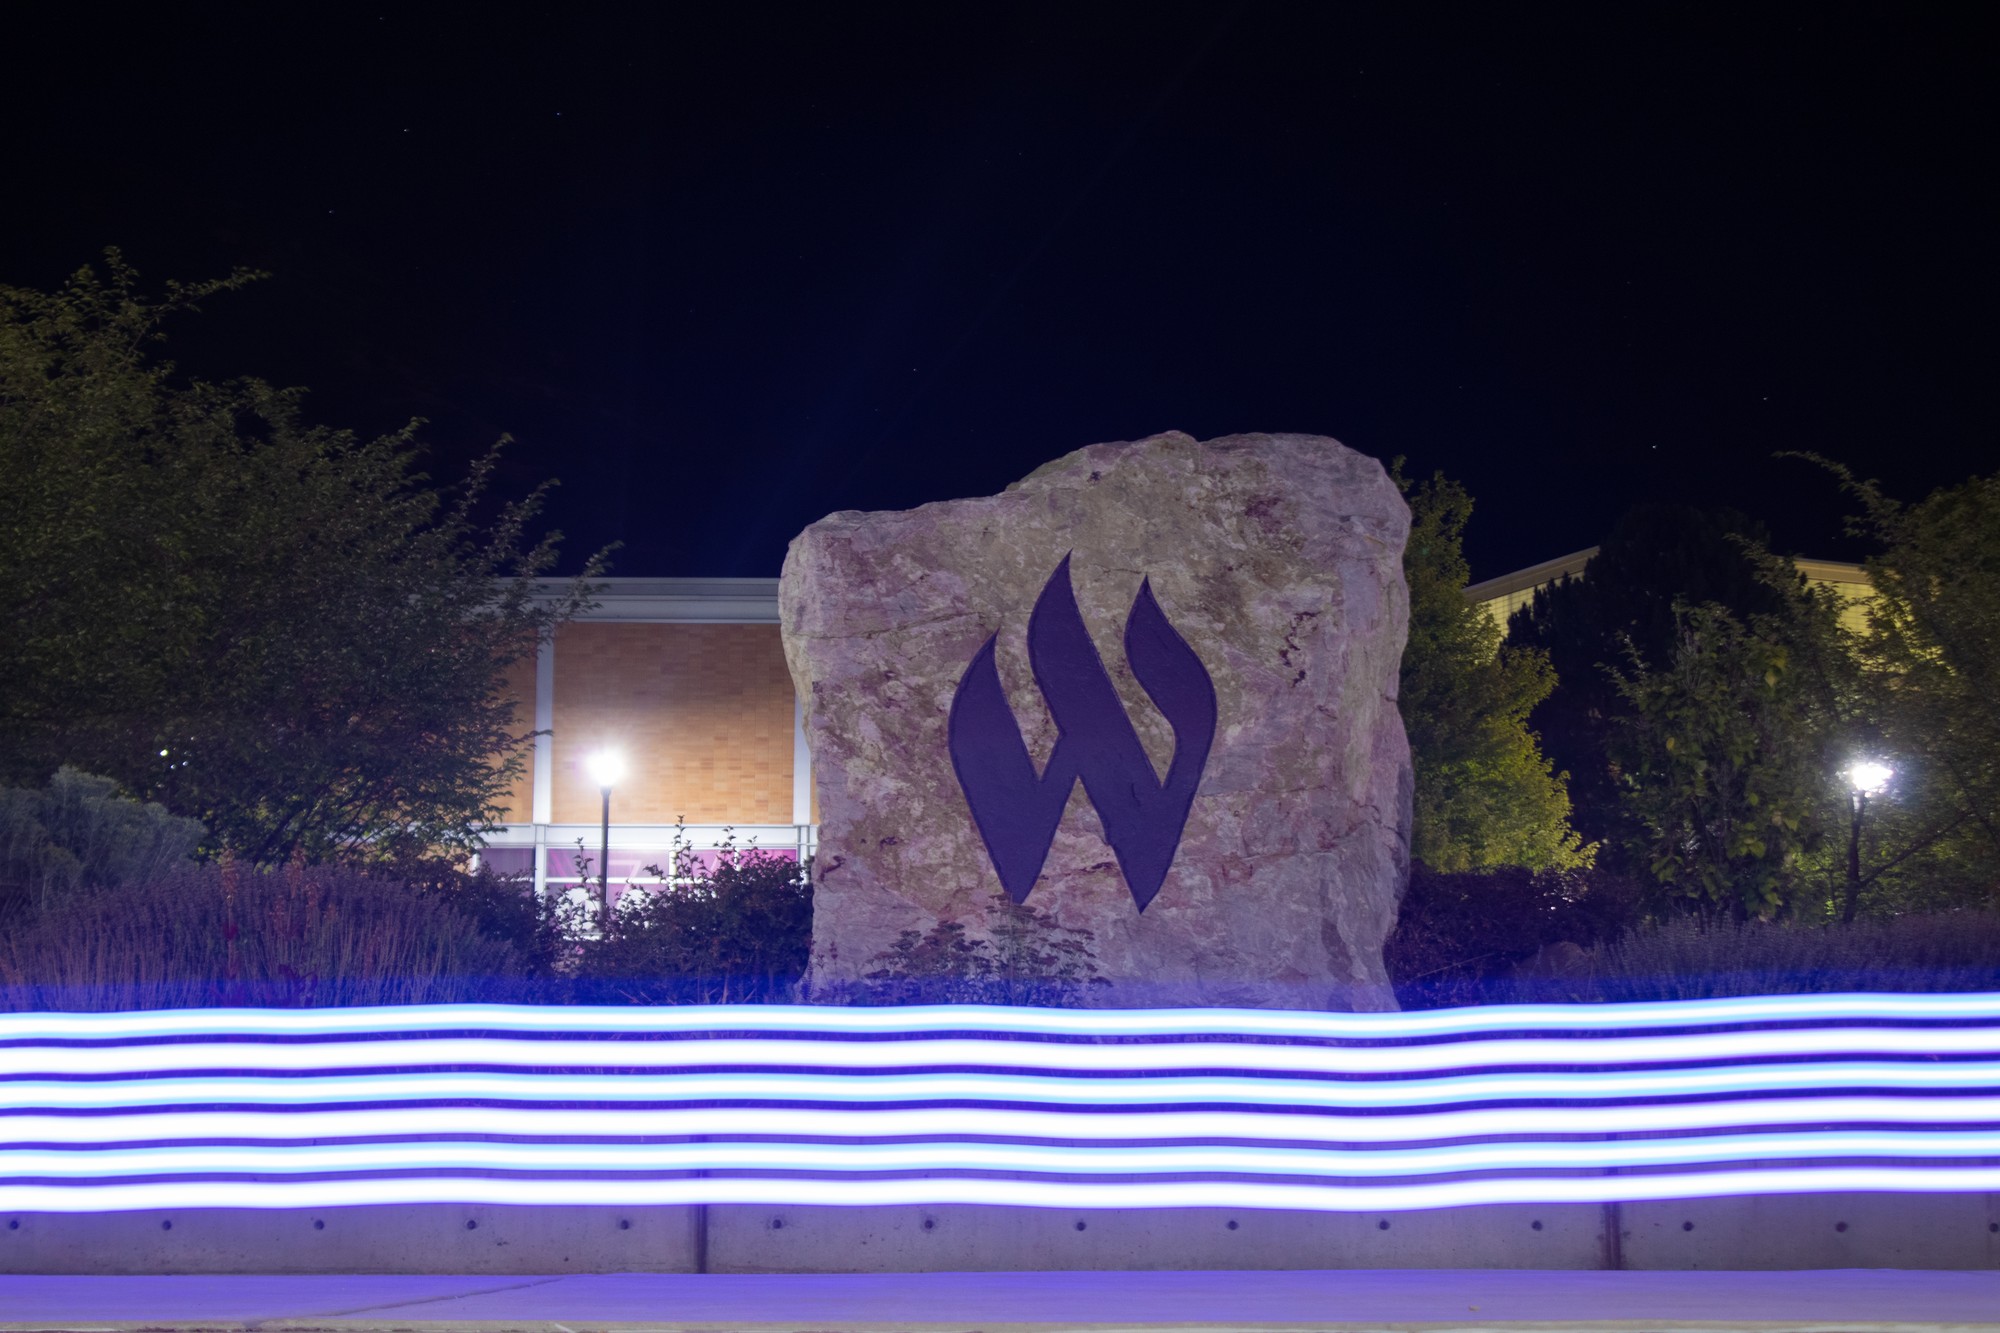
I went to Weber State University’s main campus in Ogden, Utah to take my photos. The first ones were of the statue of Louis F. Moench. I gave my stick of lights to my friend so that he could move the lights around while I controlled the camera. I set the lights to Weber State purple and we started drawing lines.
I learned that moving the lights and twisting them gave them a more interesting look than just drawing straight lines. Next, I wanted to play with more depth. So we took the lights up to the courtyard by the clock tower and used a longboard to go back and forth. We also set the lights to fade between colors making a rainbow effect.
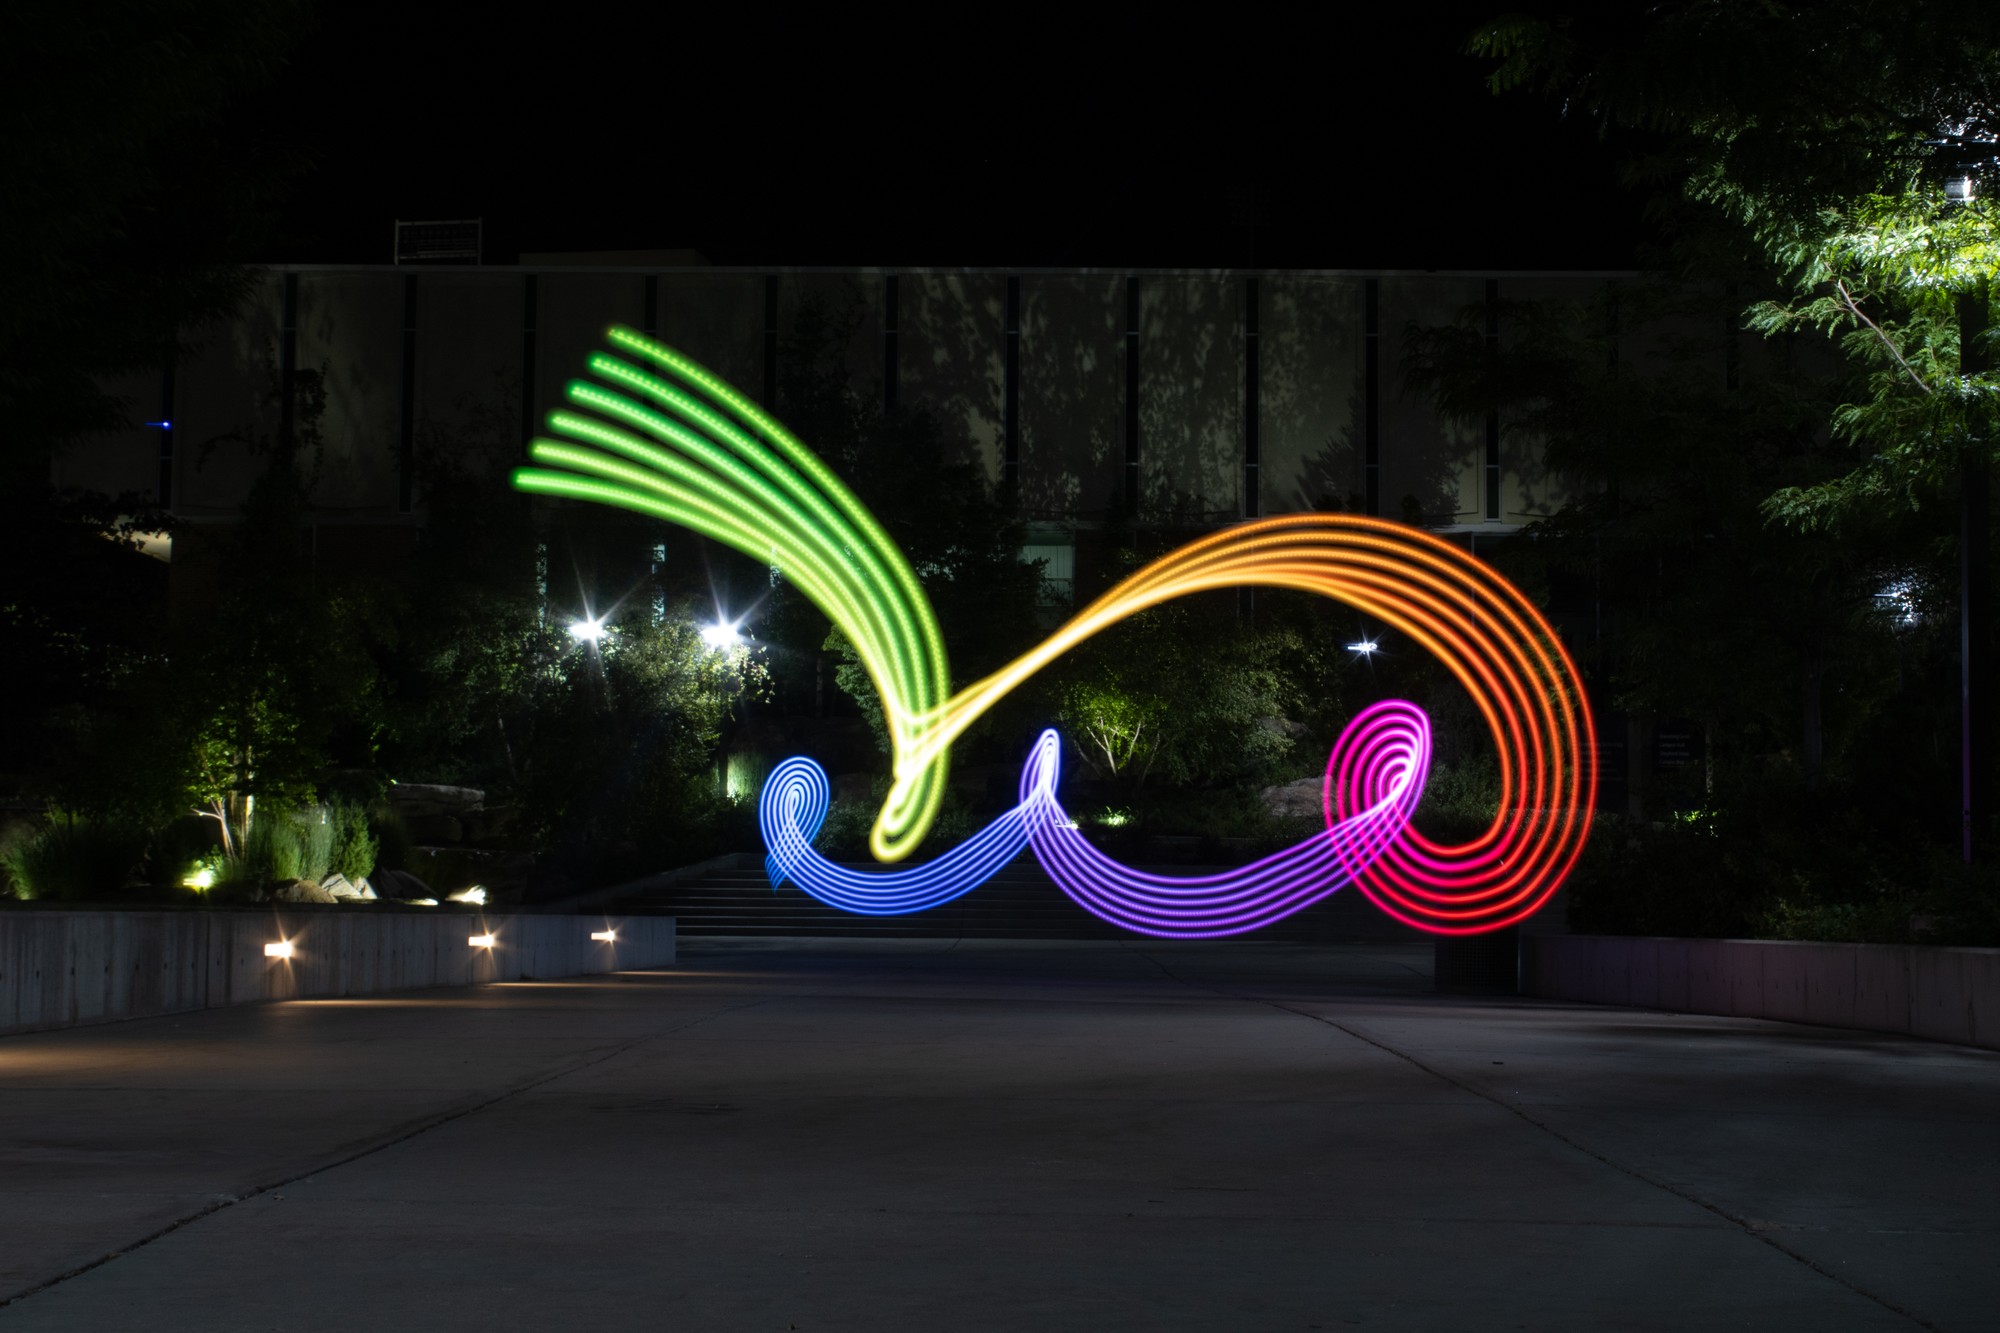
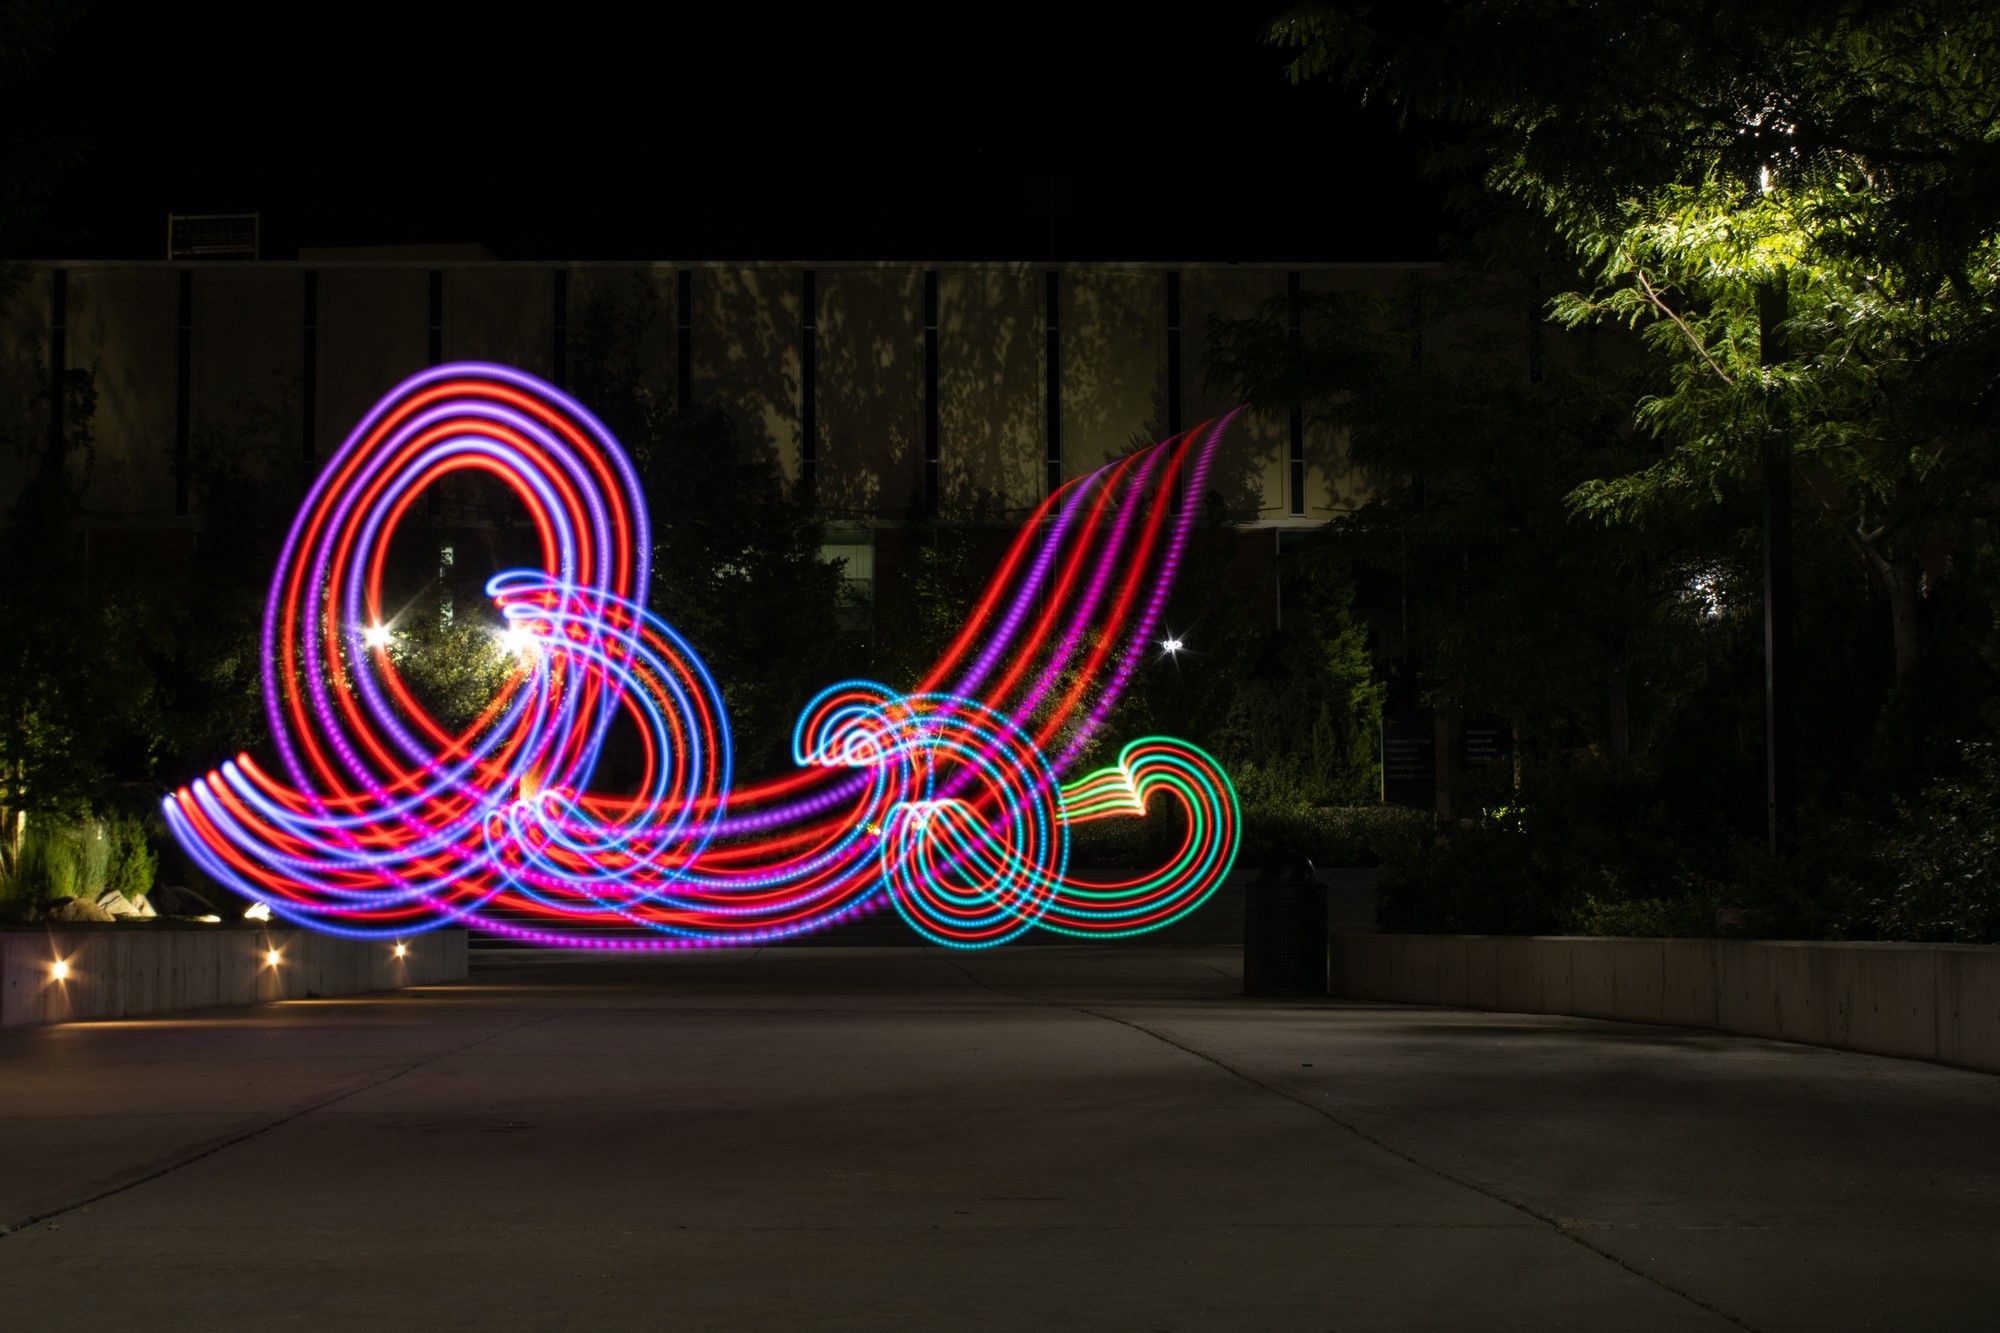
The more the person holding the lights moves the less they will be visible in the end photo. The person does not show up because compared to the time the shutter is open they are not in one place long enough for the sensor to capture them.
Taking photos like this requires very little work in post production. All I did was make the colors more vibrant and lighten the photo overall. I encourage everyone to get a friend and go take photos. One never knows how they might turn out.