

BriElle Harker and Robert Lewis are photographers for The Signpost at Weber State University in Ogden, Utah. During summer vacation, they have been practicing their craft and trying different camera techniques to give readers some ideas for taking their own photographs.
Hi, Robert here. This week, I tried photographing the stars. To do this, you need a wide-angle lens with a fast f-stop. The wider and faster the lens, the better it will be for letting in more light. You also need a tripod, and you can use the in-camera timer for setting the shutter speed. Also, it helps a lot if you are in a dark-sky area.
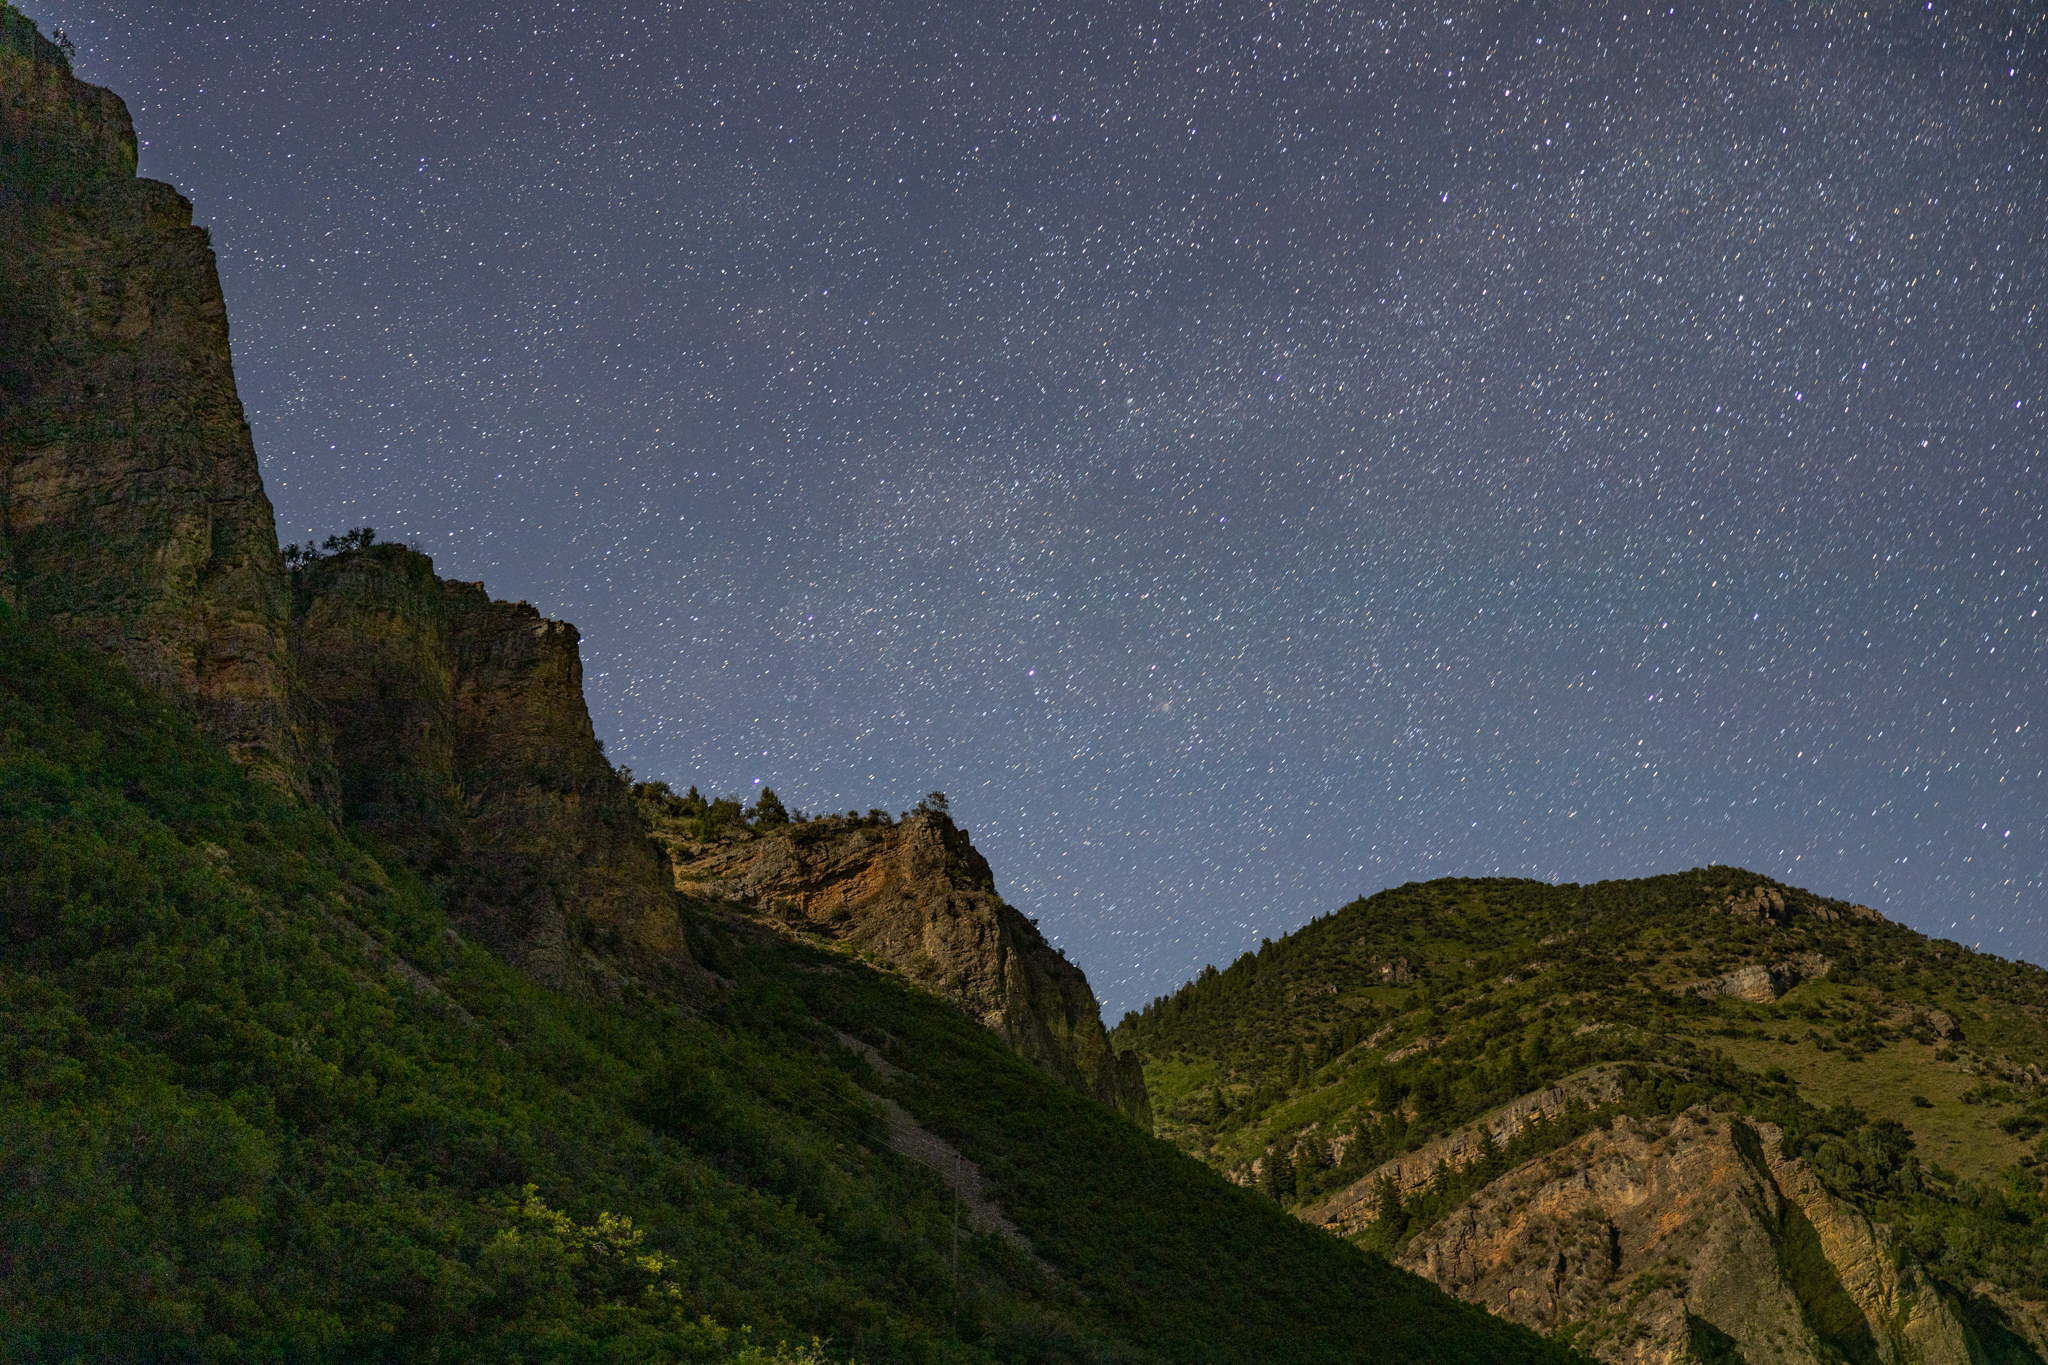
I was at Causey Reservoir near Huntsville, Utah, for my photos. It’s not a dark-sky area, but it worked okay for my first attempt at learning how to photograph the night sky.
The equipment I brought along included a tripod, a 28-millimeter-to-70-millimeter-zoom lens with a f/2.0 stop and the Canon EOS R.
I waited for a little more than an hour after sunset to set up and start photographing. At the time, the moon was in the sky. To get better photos, you should choose a time when the phase of the moon is new, to avoid its light pollution. Also, use 500 divided by the focal length of the lens to calculate the shutter time. This is to avoid blurring of the stars in photographs caused by the rotation of the earth.
In this photo, I had the camera aimed below and in the same direction as the moon. There is some light pollution. It makes the dipper hard to see.
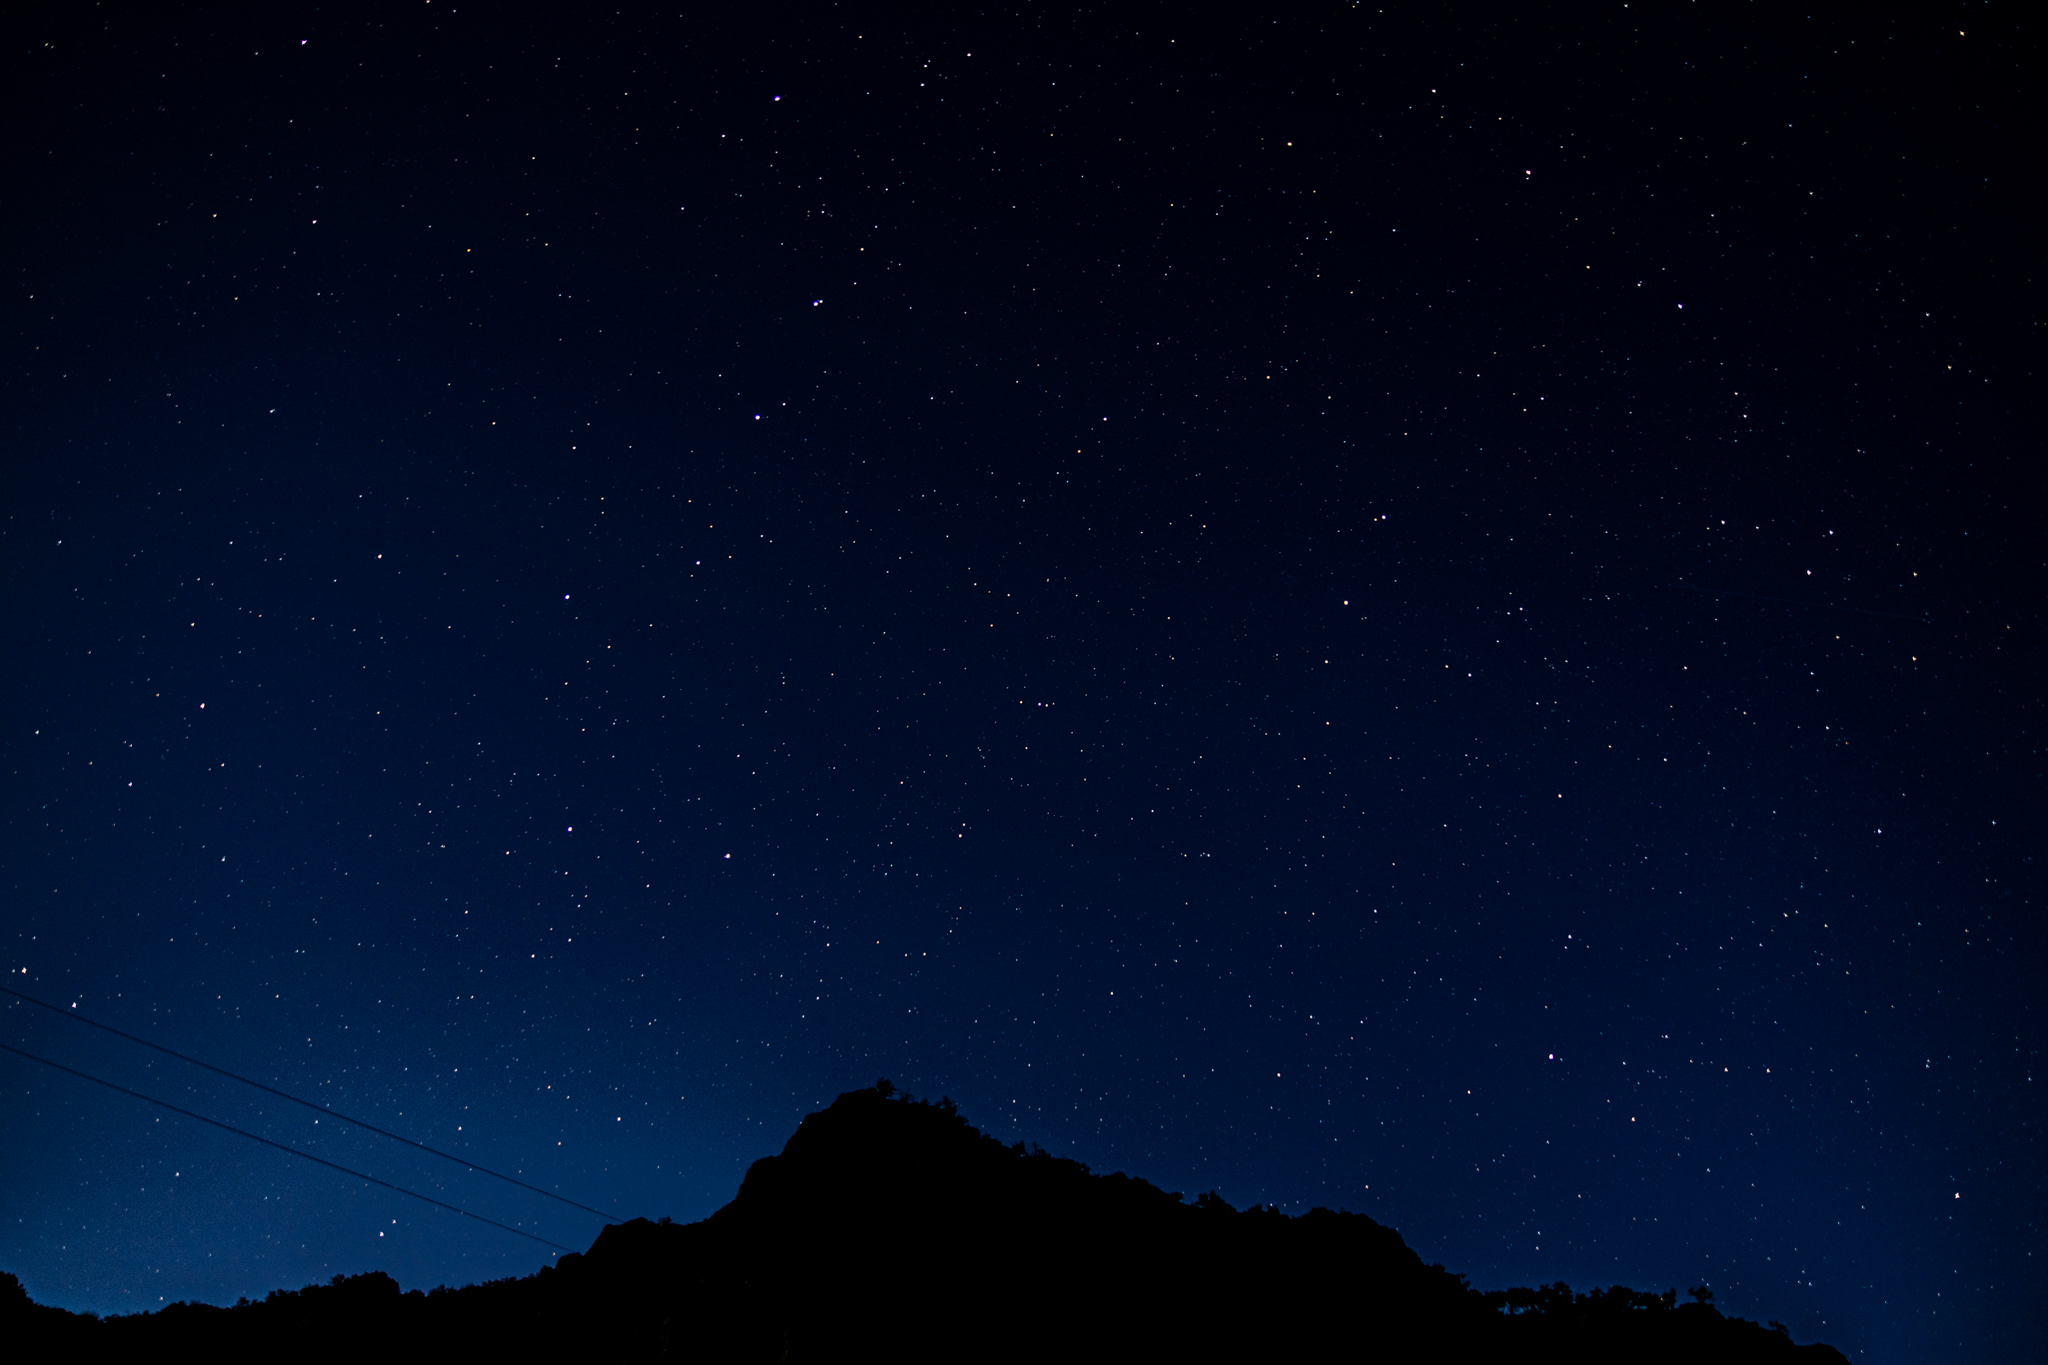
The settings I used were ISO 200, focal length at 28 millimeters, f/2.0 and time of 15 seconds.
In the next photograph, I experimented. I rotated the camera 90 degrees away from the moon’s location and lengthened the time of the shutter to approximately twice the recommendation for the focal length of the lens – 30 seconds. I also increased the ISO to 800. I did this in order to use the moonlight to illuminate the surroundings. It worked, but you can see the stars starting to blur.
I wanted to stay at the dam longer, but there was too much activity from other people to continue. So, I had to leave disappointed because I didn’t get to capture the Milky Way galaxy.
Let’s see how BriElle did.
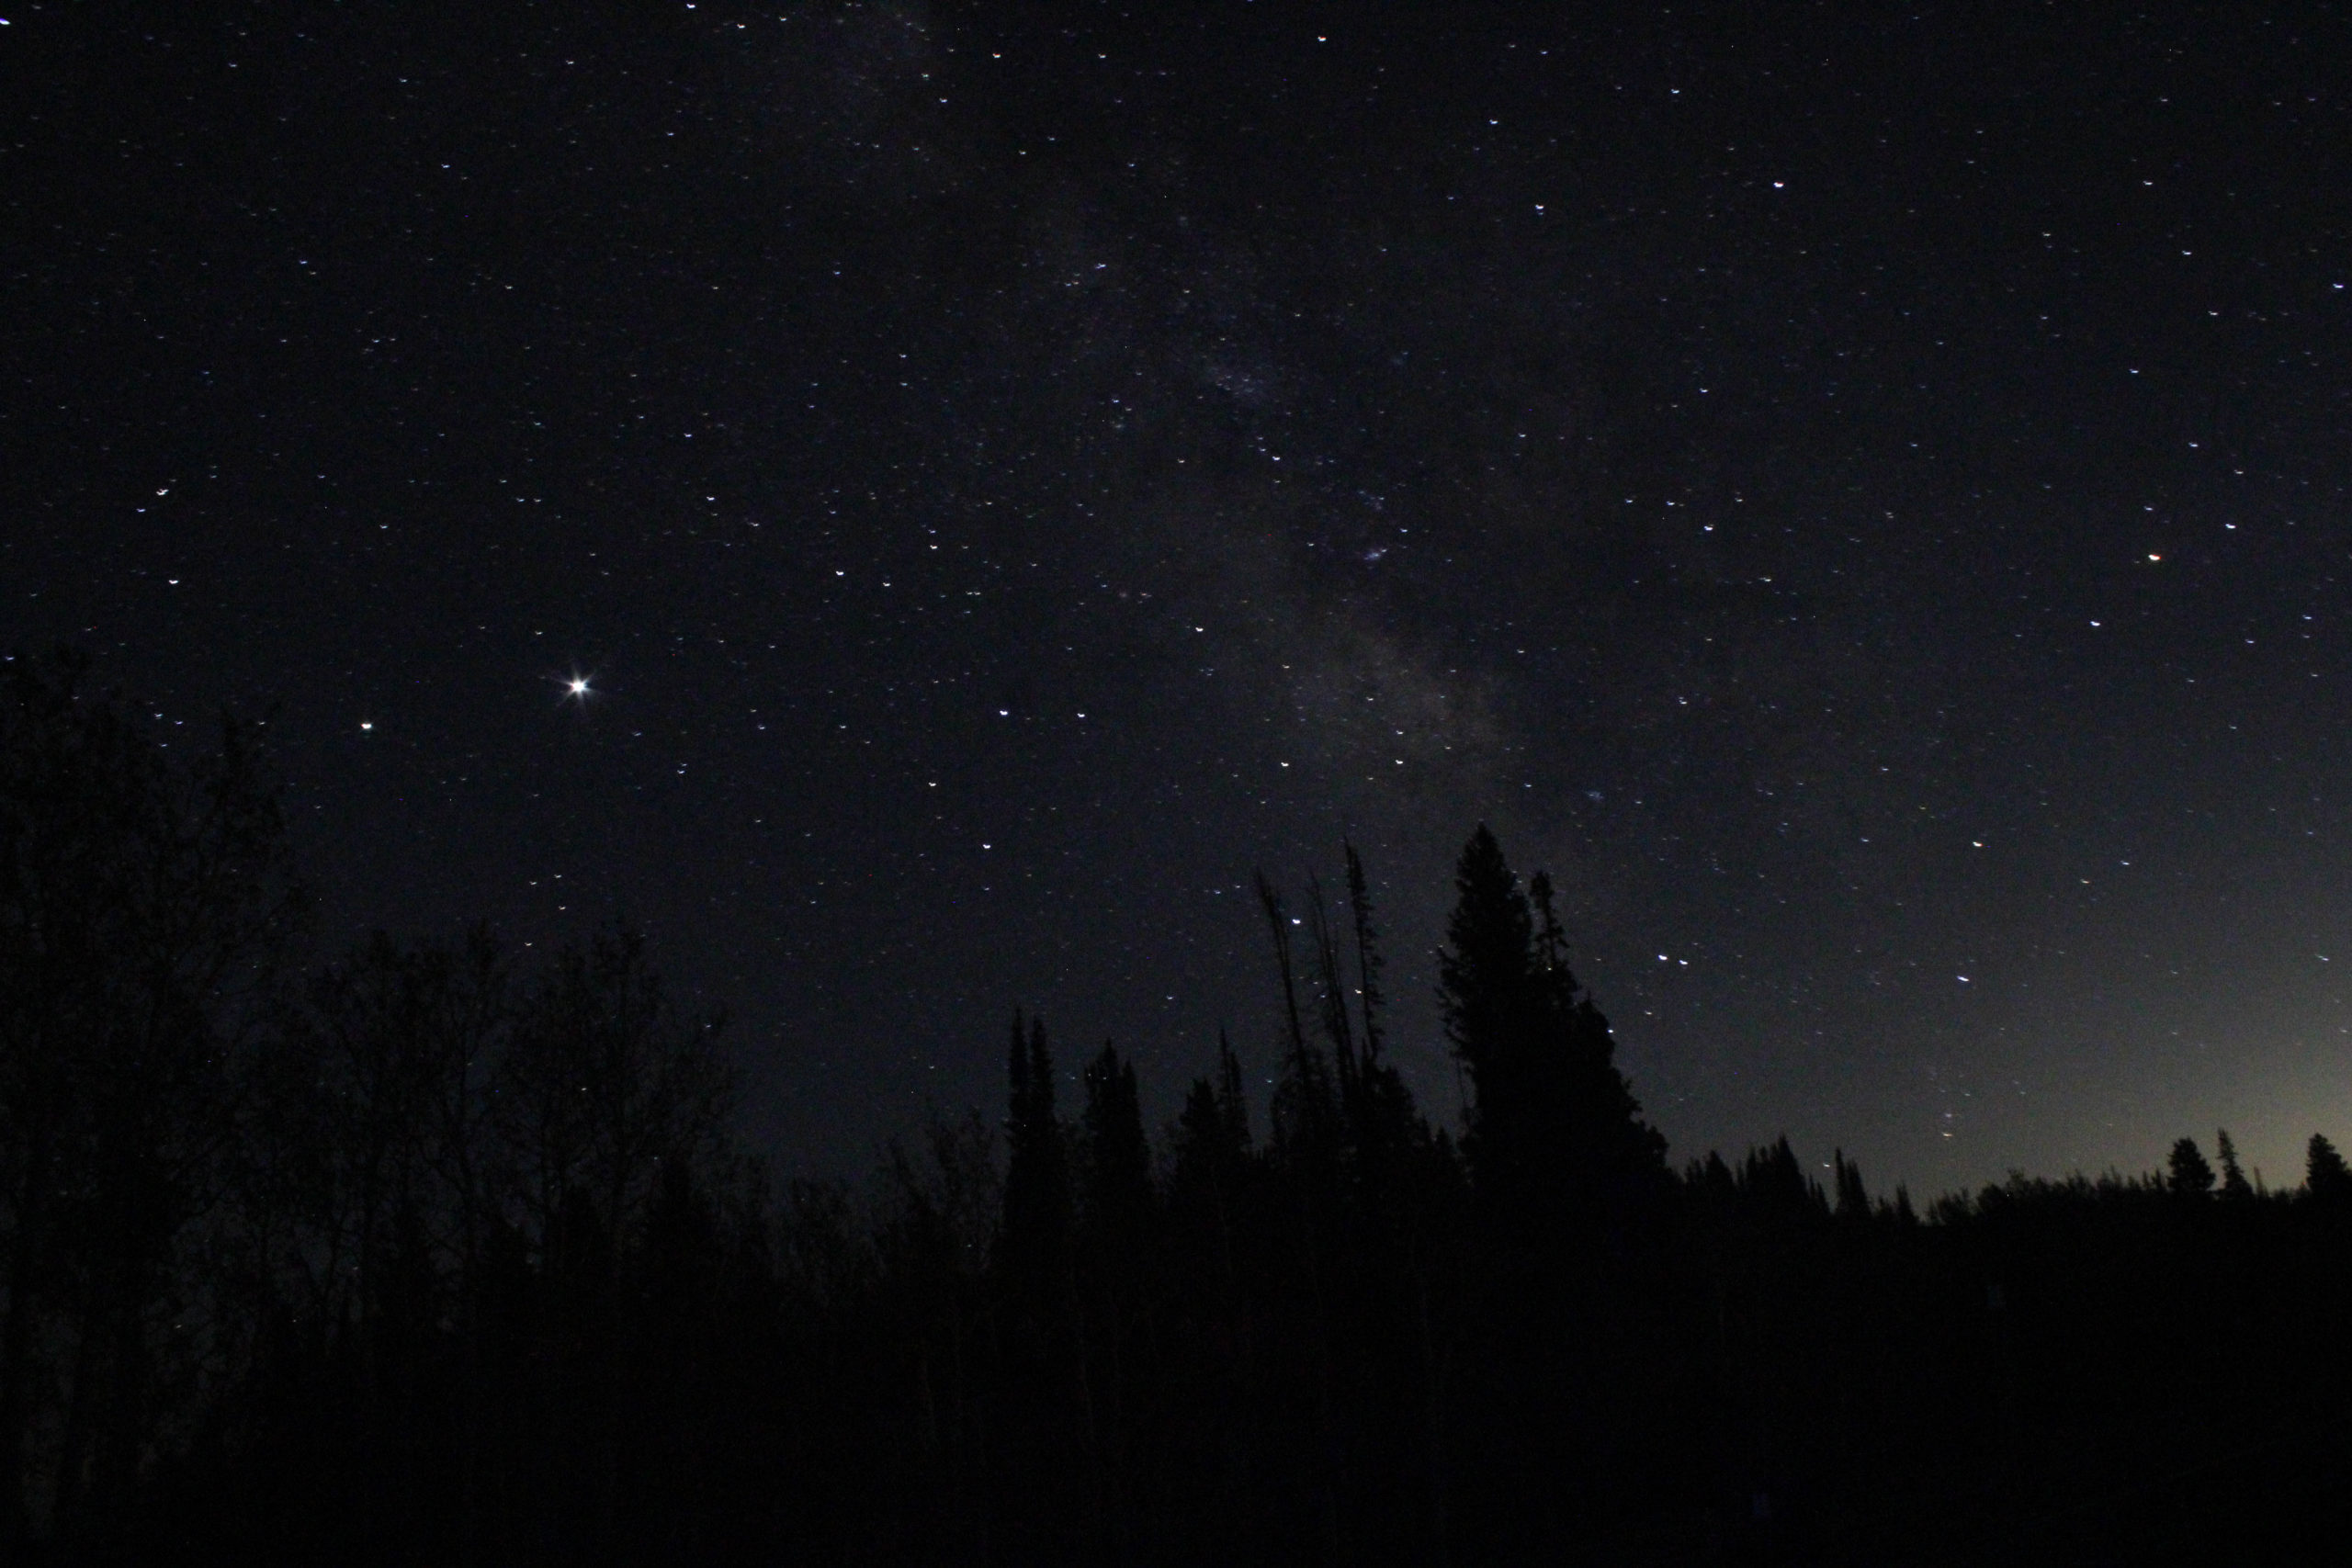
Hi, BriElle here. For my photos, I was near Monte Cristo Campground, Rich County, Utah. I also waited until after midnight in order to get as little light pollution as possible. I was using my Canon Rebel T7 along with a tripod and an 18-millimeter-to-55-millimeter lens.
One of the first things to know when setting up a camera is how to set the focus. I found it very difficult to see the stars enough to focus on them. So, I have found a few tricks. You can either find a really bright star and focus on that or the moon.
For my photos, I had a friend shine a light on the top of some trees that were as far away as possible. I then focused my camera on those. This technique only works if the f-stop on the camera is set to a large number, making the depth of field great enough to get the stars in focus.
Another issue is camera shake. This is caused when the camera moves from pressing the shutter button, which blurs the image. There are multiple ways around this. One can expose for a few minutes. The long exposure will negate the press of the shutter. Another way is to set a timer on the camera. This works by delaying the opening of the shutter for a few seconds, which is just long enough for the slight shaking to stop.
All of my photos were 30-second exposures with the ISO set at 3,600. There is a lot of controversy over using such a high ISO while taking photos. ISO changes how sensitive the light sensor within your camera is to light. If you are trying to photograph something directly in the sun, choose a lower ISO, restricting the light.
A higher ISO will allow the sensor to capture more light. The issue with a high ISO is that it can create noise within a photo, which makes photos look slightly grainy. This is why some photographers refuse to use the higher ISO settings. I have found the noise is not bad enough for me to really worry about even at these higher ISOs.
By using a higher ISO and a 30-second exposure, I was able to capture part of the Milky Way. Within this photo you can also see a really bright star on the left side. This star is actually Venus. It is brighter and larger than the rest because it is closer to the Earth than any other star in the night sky.
Space is an amazing place full of stars and planets. One can use photography to look at the different constellations and planets that surround us. Photography is an amazing thing that can allow someone to learn new things that are not even related to photography. For example, I learned that stars are different colors. Some are red and others are blue, depending on their temperature.

We encourage our readers to try taking photos of the night sky and to see the different types of images that are possible to capture.